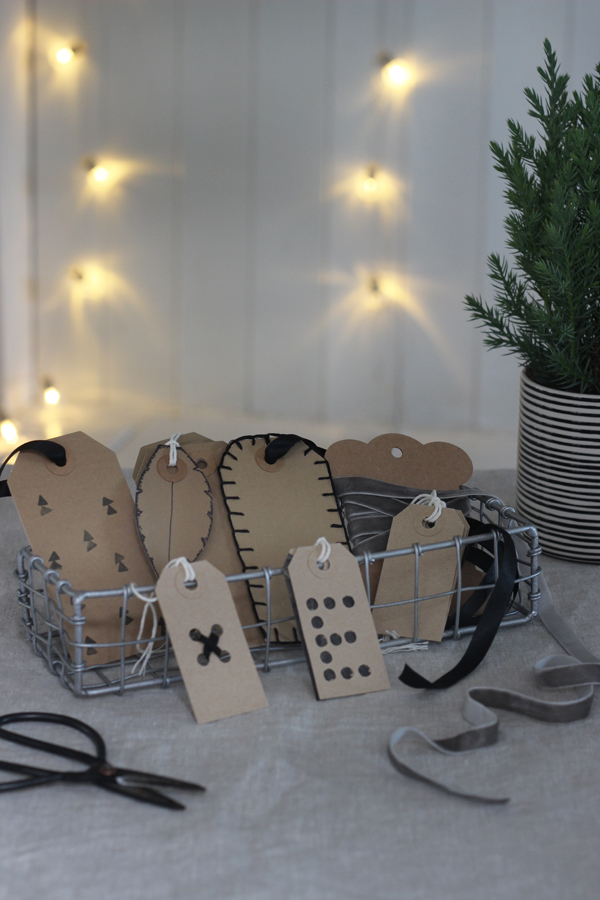
 Yesterday I shared my Christmas crafting table top for Teri from The Lovely Drawer’s 12 Styled Days of Christmas series, and I promised you’d be able to see the results of my crafternoon. This crafting session was all about giving the humble parcel tag a makeover, and I’ve come up with five different ways you can spruce up your tags using really simple materials.
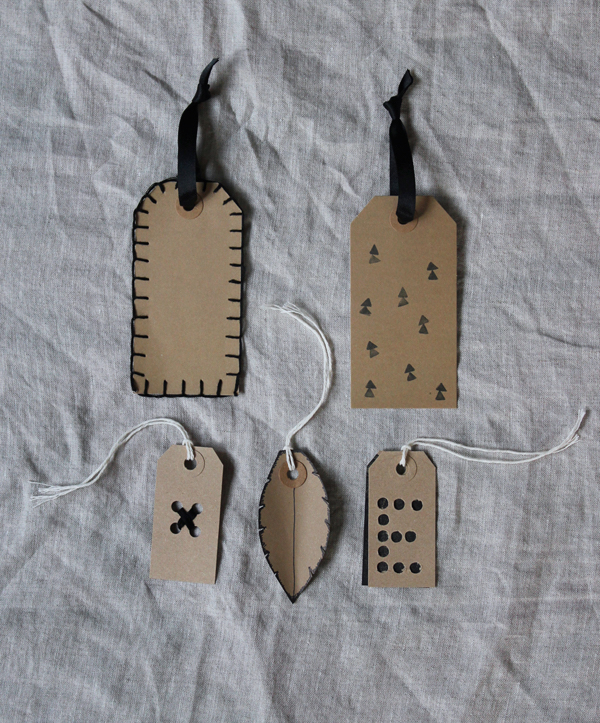 [Blanket stitched edging] I’ve given the tag on the top left an update with blanket stitching all around the edge using black embroidery thread (here’s a tutorial I recommend if you don’t know how to do blanket stitch. I’m no sewing-pro, so I promise this is very straightforward!).
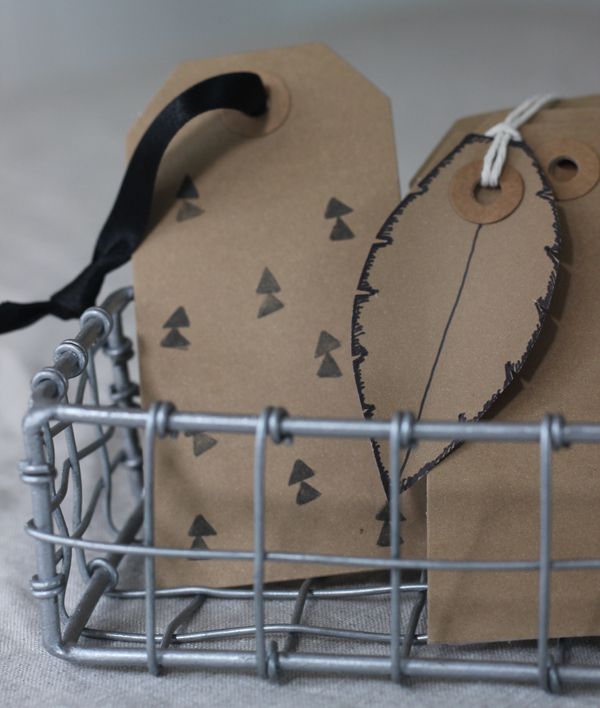 [Eraser stamped Christmas tree] You need a pencil with an eraser end. Cut a triangle into the eraser using a craft knife (remove the negative space) and then stamp two triangles on top of each other to create the shape of the trees. I’ve used black ink, but you could use any colour to suit your wrapping theme.
[Simple feather] I can’t decide if this looks more like a leaf than a feather, but I like it either way! Cut your parcel tag into a leaf/feather shape (making sure to leave the eyelet in place), and then cut small notches along each edge, about 1cm apart. I used a black Sharpie to add some rough edging to emphasise the shape. Fold the feather in half lengthways to give it a more 3D look.
 [Easy stitched kiss] Use a hole punch (a single hole puncher is easiest, but not essential) to punch four holes in a square shape, around 0.5cm apart from each other. Thread some black embroidery thread and stitch through the holes in diagonals to make a kiss design.
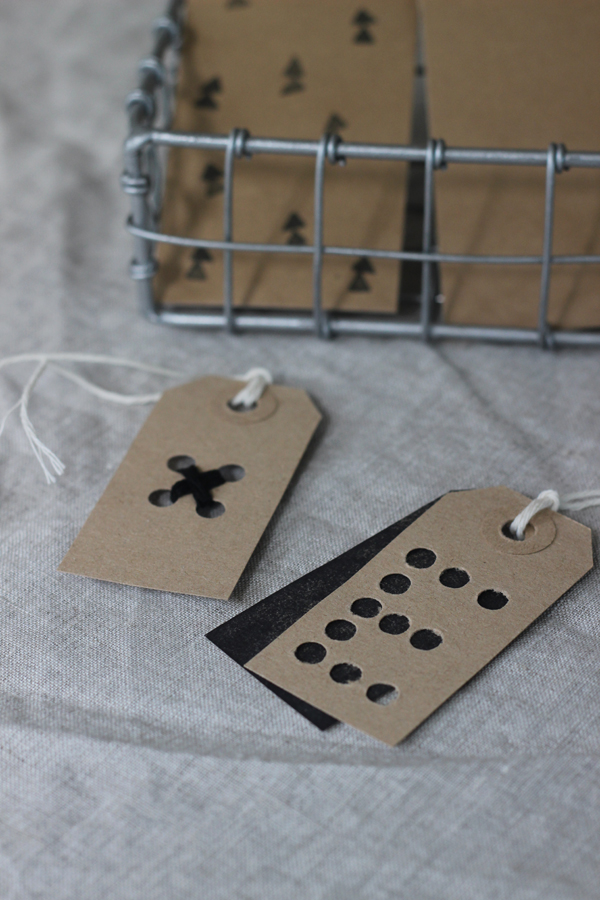 [Hole punched initial] Personalise your presents with the recipient’s initial. Use a hole punch (again, a single hole puncher makes life easier) to punch holes in the shape of your chosen letter. Take another of the same sized parcel tag and colour it (I used a black ink pad – you could use any colour), pop it behind the stamped tag and then put both tags on the same string.
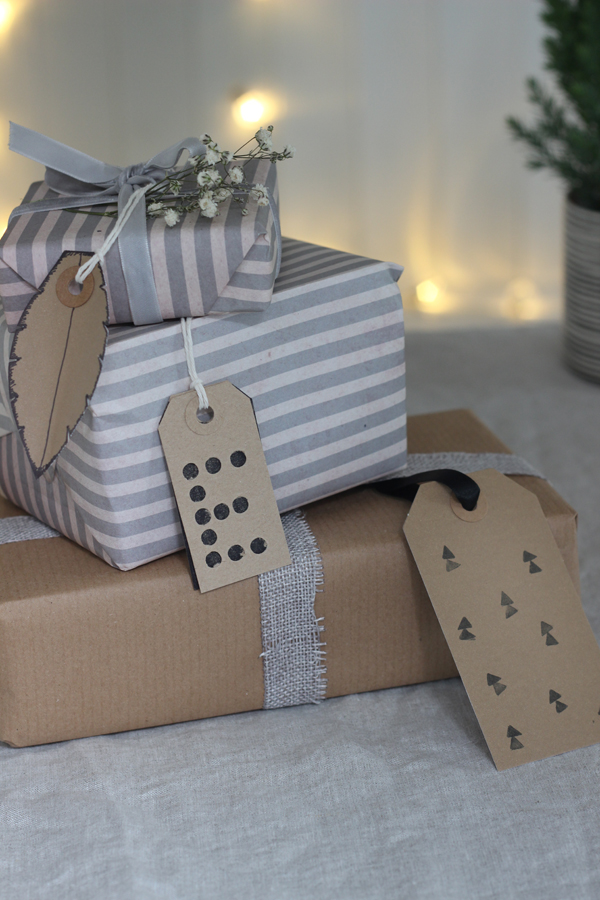 One of the easiest ways to give a parcel tag an update is by replacing the string with luxury ribbon. I did that for a couple of mine (I chose some unfussy black satin ribbon), but I quite like the simplicity of the strings for my presents this year, so I didn’t end up changing the others.
I hope you like these ideas. If I can get my act together I’m aiming to share some wrap ideas next week!
I’m linking up with this month’s #CreateMakeShare linky. Got a festive make, DIY, recipe or room makeover you’d like to share? Hop on over and add your link, too 🙂
Leave a Reply