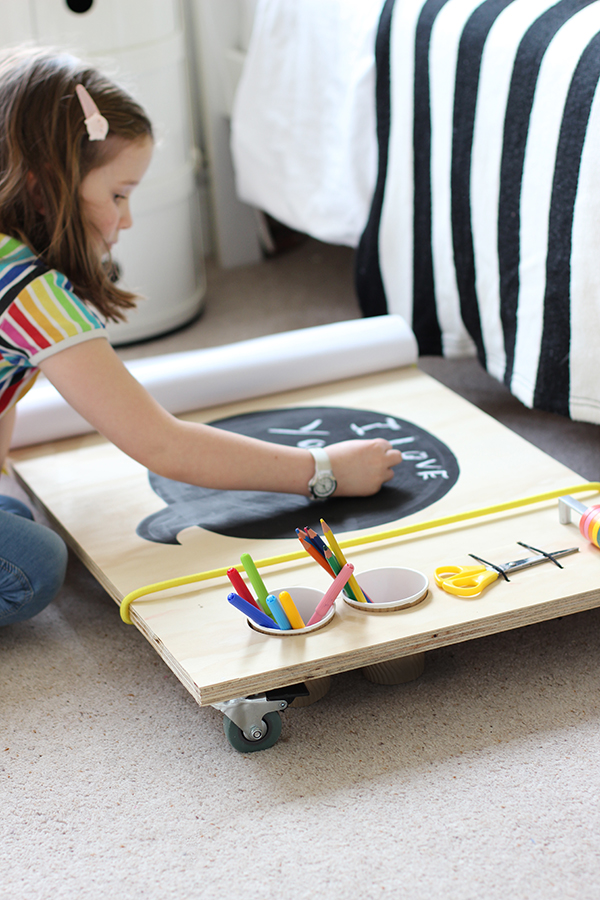
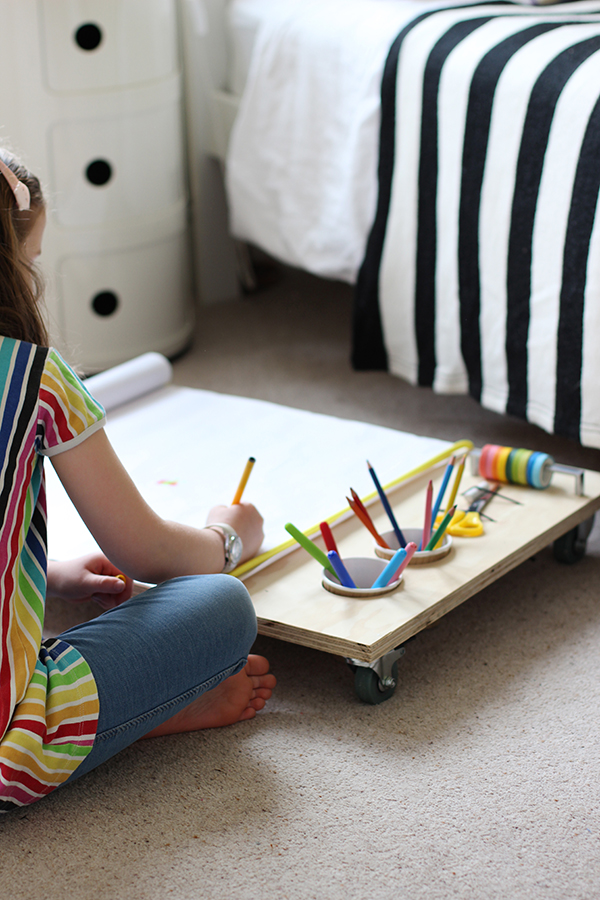
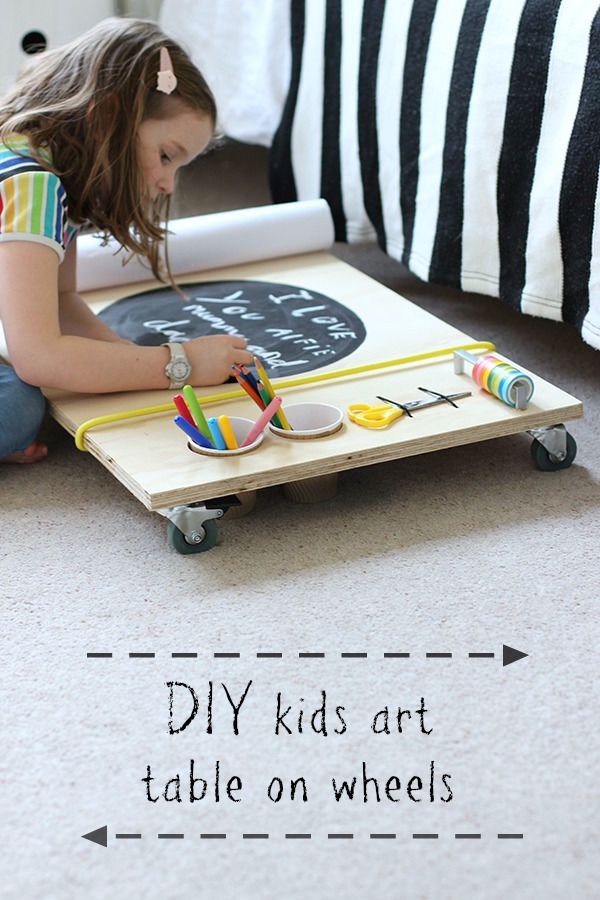
The twins (age six) like to draw all the time. They’ve moved away from colouring books, and instead produce endless drawings, collages and illustrated ‘books’. Although they each have a desk in their room, they actually enjoy drawing and creating together, so I wanted to create a surface for them with space for two, that could be stored away under their beds when not in use. We had some plywood leftover from the various DIY projects in their bedrooms, and I realised it really wouldn’t be hard to turn some of it into low tables, just by adding some casters. A few simple additions, and we’ve got a compact art station, with space for all their everyday crafting essentials – pens, pencils, scissors and washi tape.
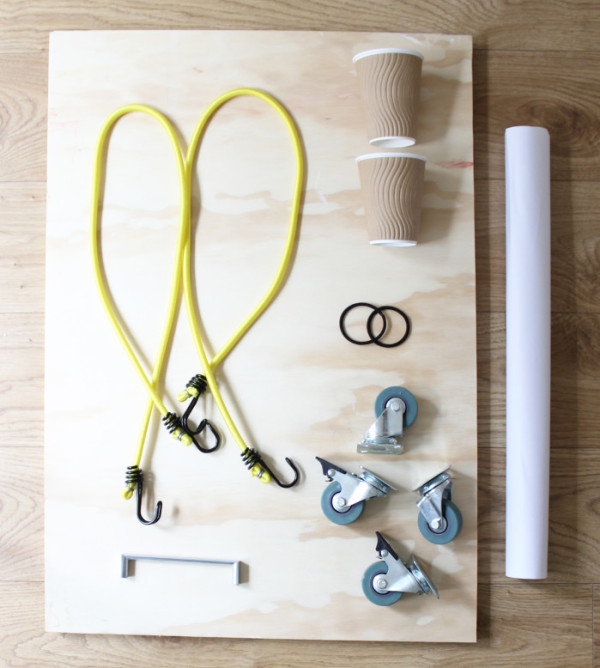
What you need:
A piece of 18mm plywood, cut to required size
2 x bungy cords
1 x D handle for cupboards (+ screw)
4 x cast0rs (+ screws)
2 x paper cups (or something round with a rim)
2 x hair bands (or elastic)
1 x roll of plain paper
1 x drill with 76mm hole saw and 4.5mm wood drill bit
1 x staple gun
1 x screwdriver
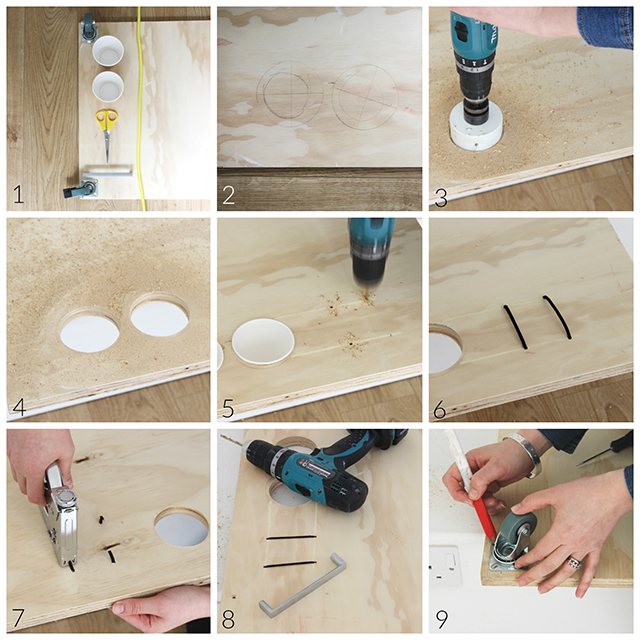
Instructions:
1. Lay out your elements to get the spacing right, making sure you’re left with space to mount the castors onto the corners of the board.
2. Draw around the cups and mark the centre points.
3 & 4. Use a hole saw (choose one slightly smaller than the top of the cup) to cut out two cup-sized holes.
5. Mark the four points of a rectangle, and drill a hole at each corner.
6. Cut two hair bobbles in half, and push the ends through adjacent holes.
7. Flip the board over and staple the bobble ends in place. Make sure to pull the bobble nice and taut.
8. Drill a hole for one end of the cupboard handle, and screw in place on the top side of the board. This will act as a pivot. Don’t screw the other end in place!
9. Use a pencil to mark the position of each castor, and screw in place at each corner of the bottom surface of the board.
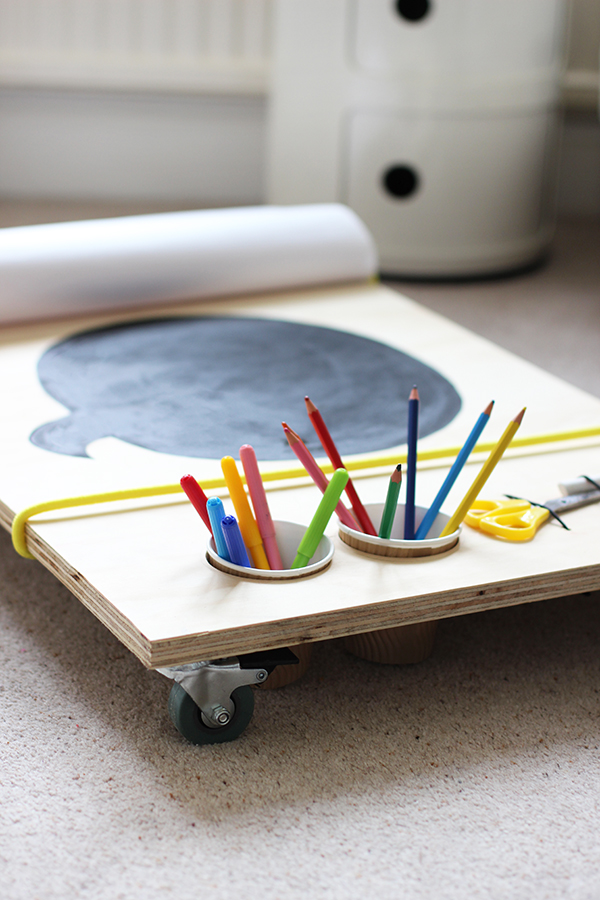
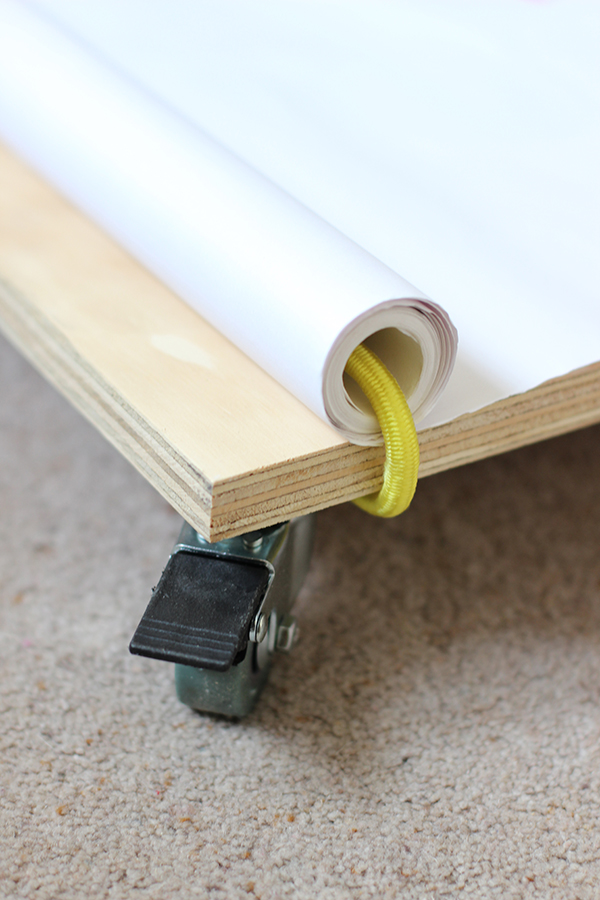
Once the table was made, I threaded one of the bungy cords through the centre of the roll of paper (we had to straighten out the hook to get it through), placed the roll on the top surface of the board and hooked the two bungy cord hooks together underneath the board to hold the roll in place. The tension should be loose enough so you can unroll the paper. I looped the other bungy cord around the other end of the board, hooked up the two hooks underneath, and this holds the end of the paper in place when it’s rolled out. I popped the two paper cups into the holes to hold pens and pencils. The hair bobble elastic will hold a pair of scissors or a ruler, and the end of the D handle pivots off the board so that you loop the washi tapes onto the handle and then swing it back into place.
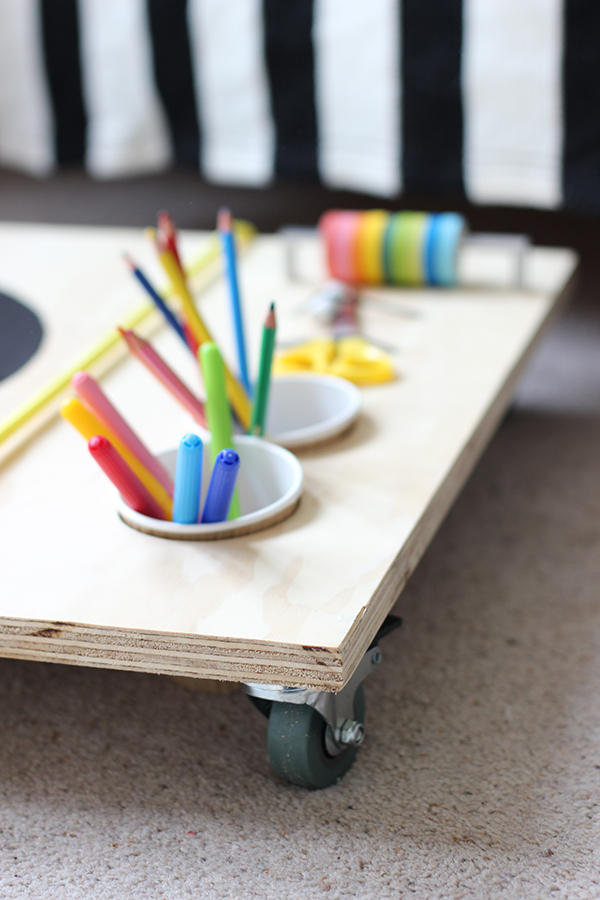
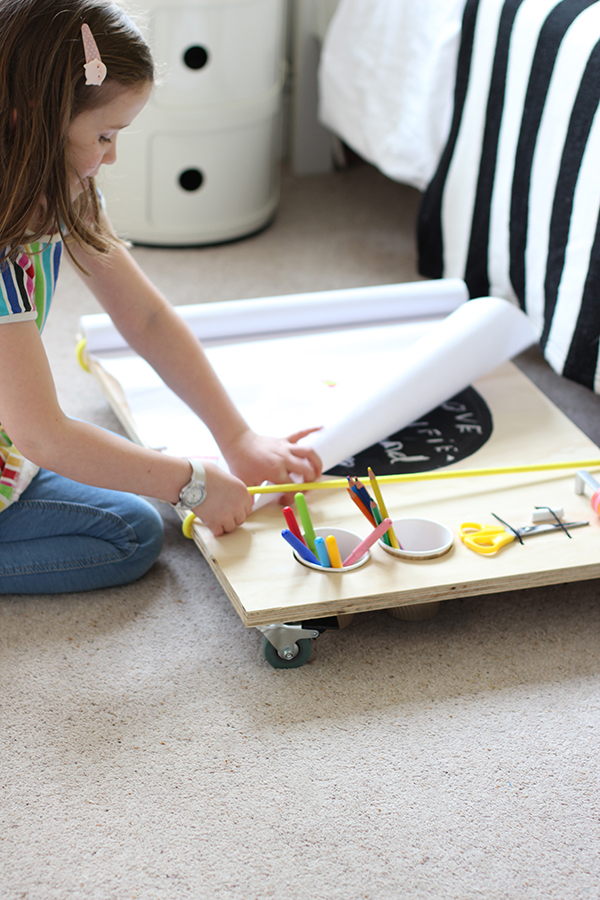
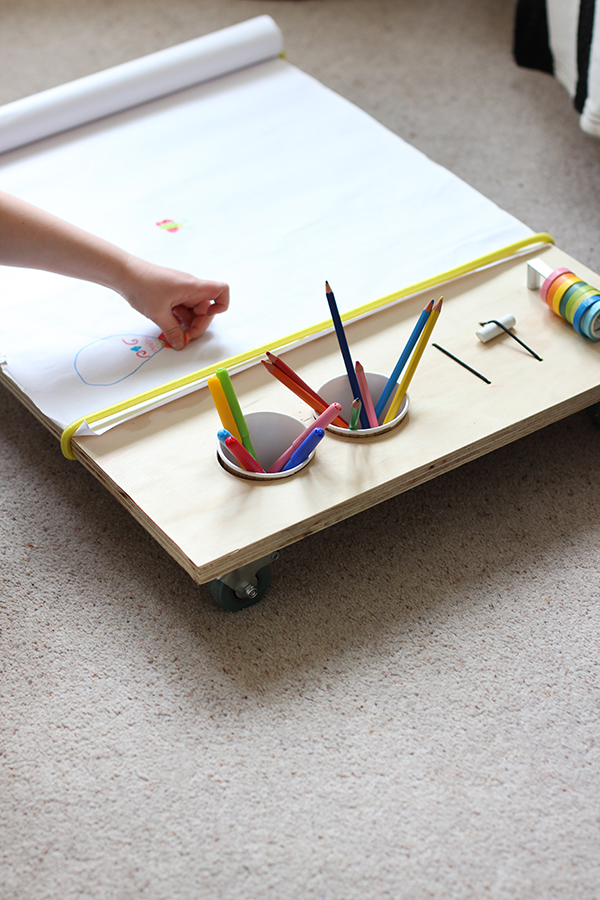
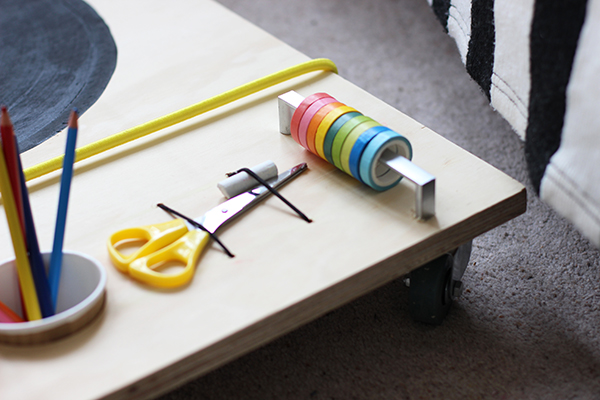
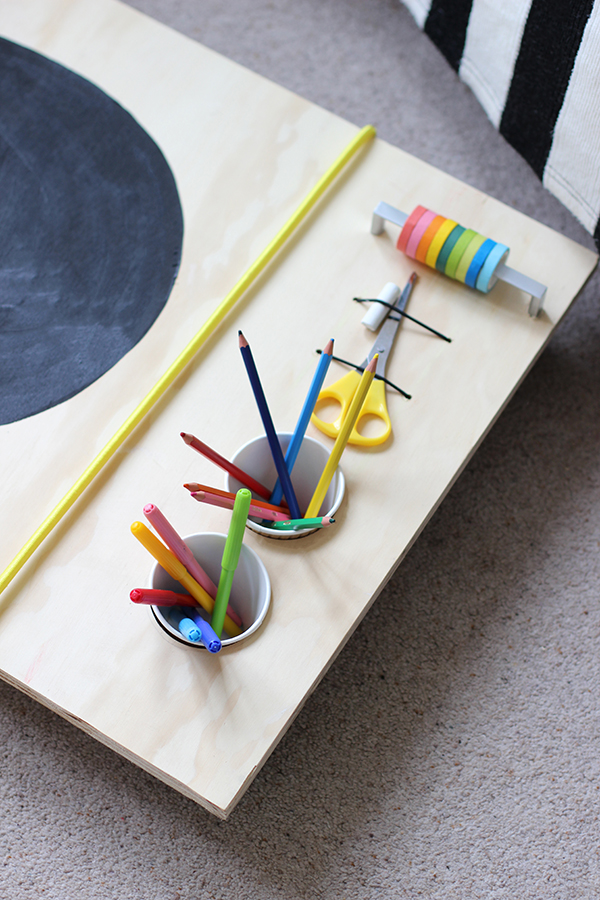
As an afterthought I added a speech bubble painted with blackboard paint onto the plywood surface. I thought it would be nice to have somewhere the kids could chalk up messages to each other, and it adds a nice decorative element when the table isn’t in use.
For a video tutorial of this project, head over to my Heather’s Space channel on YouTube.
Oh, and if you need some more DIY inspiration for the bank holiday, check out this post I wrote for British Gas about easy weekend hacks to do in a weekend. Happy DIYing!
Amazing!!!
oh I want to make this! great inspiration x
Do it! Really easy, I promise.
That is so cool – clever idea
Thankyou! Such a simple idea really x
Wow! This is such a great idea! And so cost effective!
wow!amazing idea. Kids art table on wheels! really I like. I need it for my kids. I must say, my kids, love it. Thanks for sharing this idea.
Wow!What a pretty idea. Something really unique. I love it. Must say kids must love it.