We recently decorated our hallway, stairway and landing – finally ridding the house of its last areas of beige and magnolia, and painting everything a fresh, bright white. Obviously this meant taking everything down off the walls, and I’ve taken my time deciding what to fill that great, white expanse of wall on the stairway. I wanted to try to introduce some plants there if I could, but I couldn’t work out quite how to go about doing it. Then I went along to B&Q’s recent press show, and saw some clever wall hooks made using plywood – we were even given a tutorial sheet to take home. We all know what a fan I am of using plywood in interiors, and an idea started to take shape.
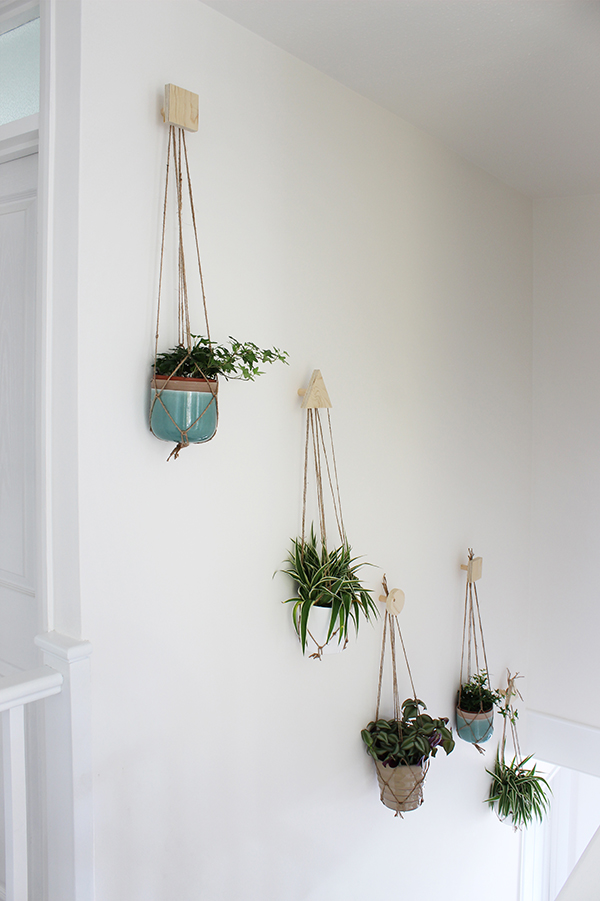
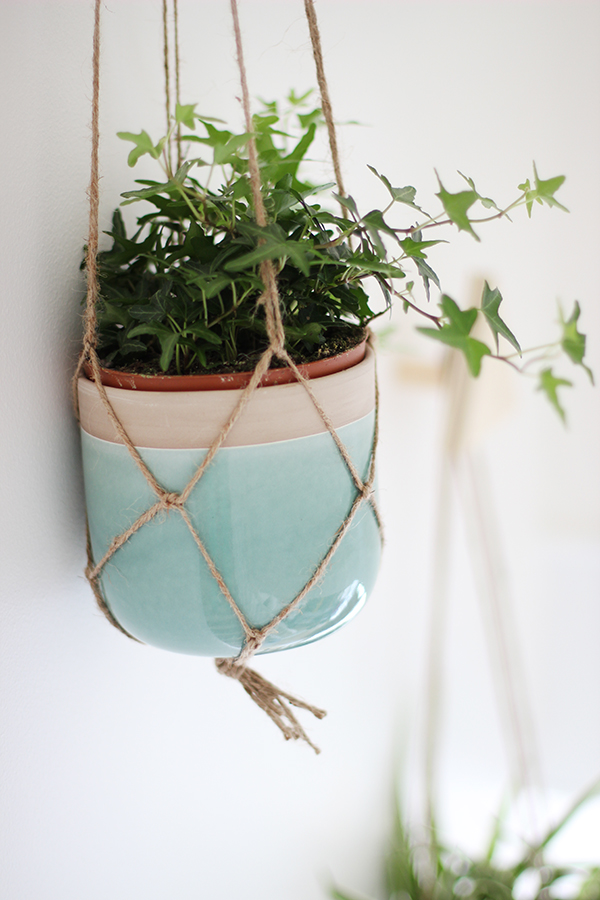
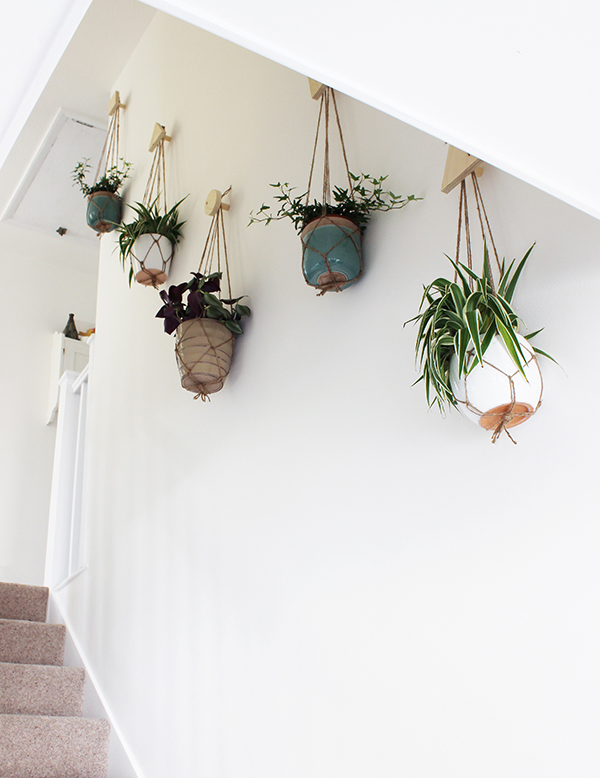
B&Q had also sent me a handy tutorial for a hanging planter when I worked on my Spring Summer styling post, but I hadn’t had the chance to try making one. I decided that I’d use both ideas at once, and make a set of hanging planters to hang from plywood hooks arranged across the stairway wall. While Ben was tasked with constructing the hooks, I started on the macramé hangers. I made one using cotton cord but quickly realised I wouldn’t have nearly enough cord, so I switched to garden twine, and I actually really love the rustic element that the twine adds to the display.
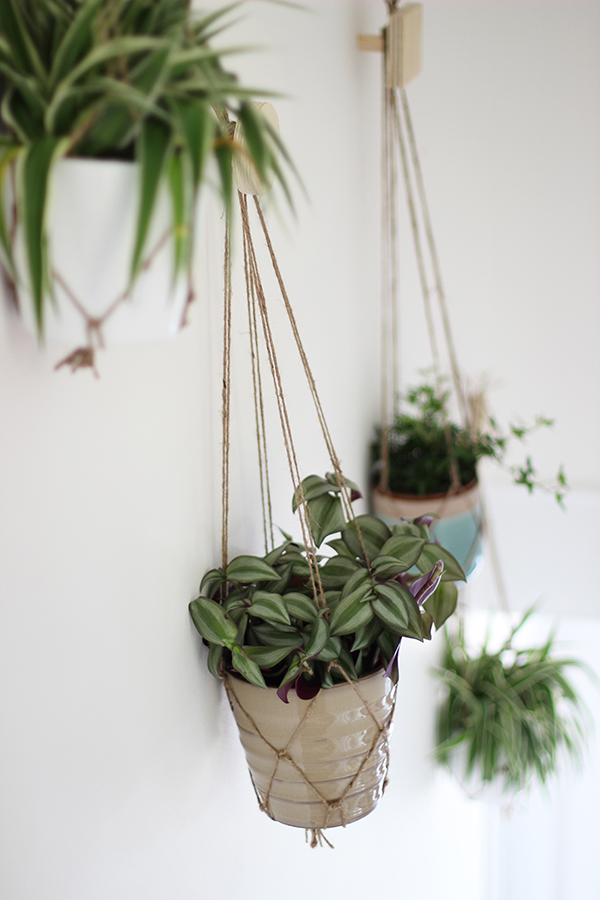
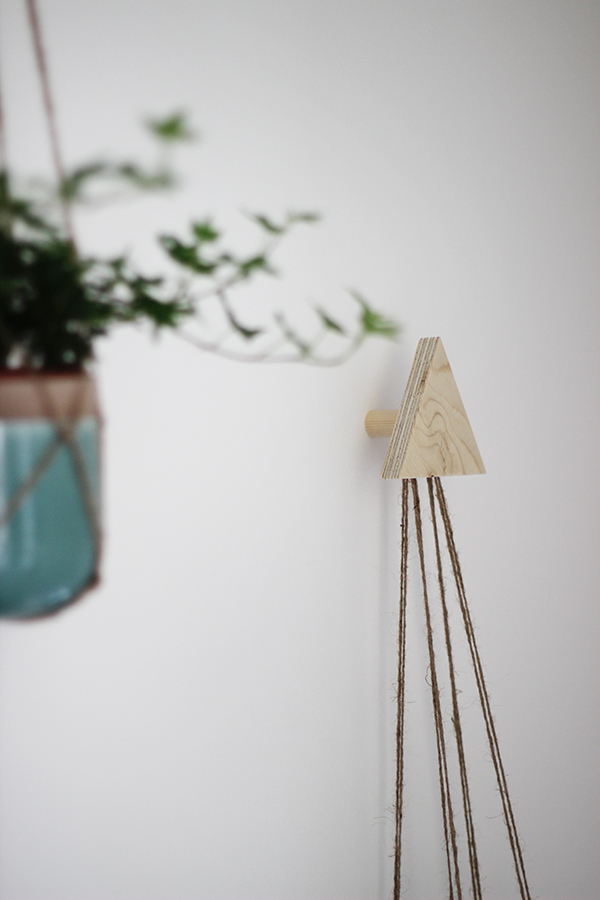
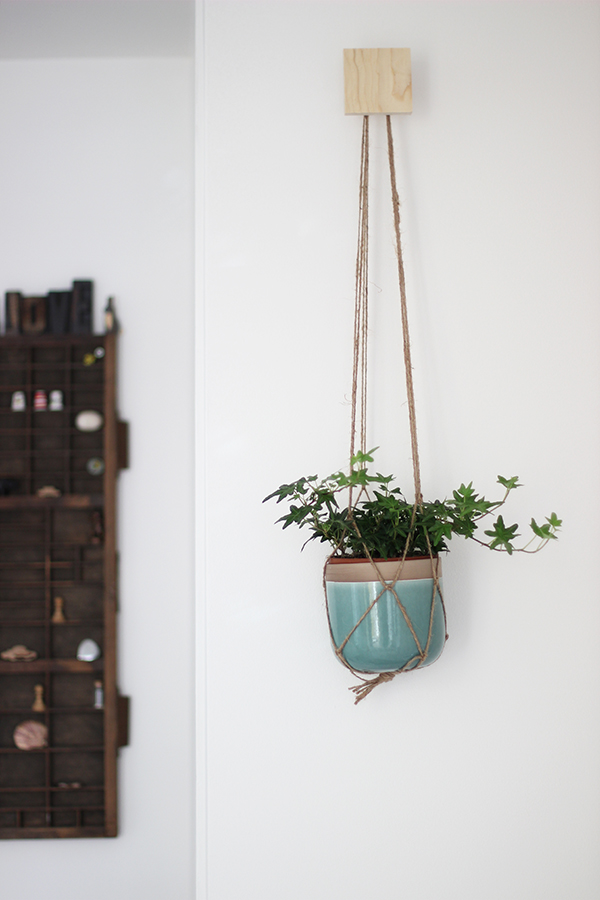
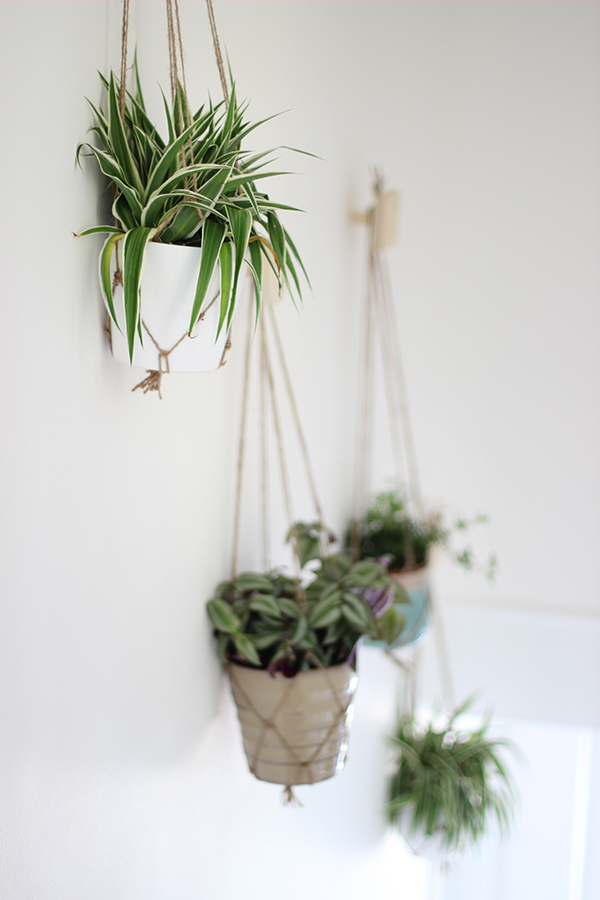
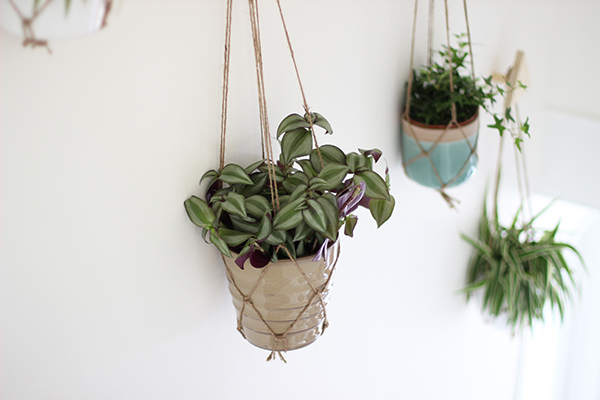
Ben knocked up the hooks for me using 18mm plywood, wooden dowel rod (20mm) and dowel screws. The tutorial from B&Q had the plywood shape screwed onto the dowel, but we cheated and used wood glue (to avoid having to fill screw holes on the front). I went for an odd number of hooks and planters (a stylist’s trick to pull an arrangement together) – five seemed the perfect number to fill the space without the display feeling too crowded and busy. I chose some trailing plants – ivy and tradescantia – as well as a couple of spider plants, and the pots and plants all came from my local B&Q store.
Instructions for the hanging planter (adapted from the B&Q tutorial):
- Measure 8 lengths of string (mine measured 1m long), and tie them all together in a knot at one end.
- Separate them into pairs, and knot each pair together, around 7cm from the big knot at the end.
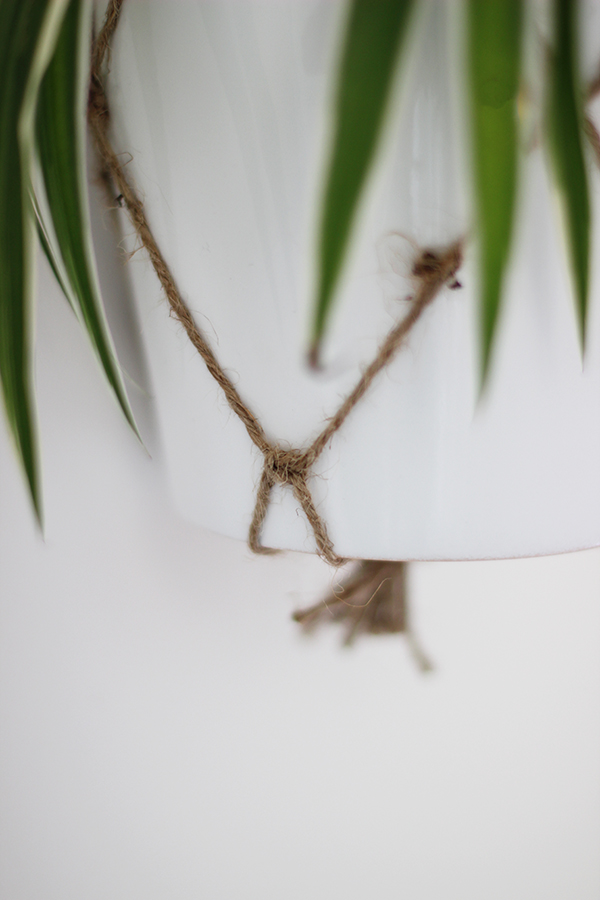
- Once all four pairs have been knotted together, knot one string from one pair with a string from the adjacent pair (I left about 8cm from the last knot), to create a zigzag effect. I repeated this twice, creating what looks almost like a fishing net.
- Sit the plant pot onto the big knot at the bottom, bring up all the lengths of string around the pot and tie in a knot at the very top, which can loop over the hook.
Instructions for the hooks (adapted from the B&Q tutorial):
- Mark out your shape onto the plywood (we made circles, triangles and squares, but you could try any shape), clamp it and cut out with a saw.
- Work out how deep you want your hook, mark the dowel and saw the required length.
- Drill a pilot hole in the centre of the dowel and fasten the dowel screw.
- Apply wood glue to the other end of the dowel and fix to the centre of the plywood shape.
There’s a video tutorial of this project up on my YouTube channel, Heather’s Space, click here to watch, or even better, subscribe to my channel and then you can be sure you won’t miss any of my videos!
I’m going to link this post up to this month’s Create Make Share linky, as I think it’s a perfect fit for the theme of ‘Bloom’. Have you got a creative project or makeover that you’d like to share? Please do head on over, and add your link too.
Disclosure: B&Q supplied the products used in this post free of charge
Looks brilliant! Love it x
Love this idea and great tutorial ! Growing up we had a house full of hanging plants but that was in the tropics and it kind of fitted. I was wondering how to hang them in my Victorian house as I thought they’d look a bit silly hanging from the ceiling but I like your idea of hanging them from the wall up the stairs. Thanks.
Hi there, could I ask the name of the plant that’s green with tinge of purple leaves?
Thank you
It’s a tradescantia zebrina
I love this idea. every home should have plants and this is a great way to display them. and its always nice to have something to talk to.
This looks fab! Eying up this project for th bank holiday weekend 🙂 just a quick question, how do you fix the hooks to the wall?
Dowel screws have one end that screws into the dowel, and the other end is like a standard screw, so you drill a hole in the wall, insert a rawl plug and screw the hook into that. Good luck!
This design is steller! You obviously know how to keep a reader
amused. Between your wit and your videos, I was almost moved to
start my own blog (well, almost…HaHa!) Fantastic job.
I really enjoyed what you had to say, and more than that, how you presented
it. Too cool!
This is a great article which I’ve bookmarked. I’m mad for houseplants, but in the last year I moved to a smaller more modern house. So the rooms are smaller and there is just less space to display or place them. I’ve known for a while that the staircase is the most sparse place in the home but didn’t like the idea of having a load of pots actually sitting on the stairs. This is so clever as I’ve loads of wall space to hang them like you have. Thanks for sharing Heather!
This is exactly why I decided to put them on the stairs – it’s such a huge, sparse space otherwise! Good luck.
I starting to decorate my walls and this post is awesome! I learnt a lot! Please keep posting more ideas! I love them.
These are great! Can you tell me the length of the macrame holders from top to bottom please? Thanks!
Nice
Thank you very much for this post.
I was looking for some ideas to decorate my small patio. I think that with some pending plants from the roof and some on the walls and also some shelves with decoration items it would look fantastic!
Regards.
A great design, the reality kept me entertained, your wit in the videos impacted me, including I started my own blog, not as nice as yours, but I love it. Thank you very much.
I was thinking several ways to reform the balcony of my town house, for this month of August. Your ideas have helped me. Probably my web interests you for a gift.
Nice blog, I was looking for some ideas to decorate garden and I found this nice plants also to decorate other spaces. Nice ideas.
kind regards
Love what you create. Sure ,I’ll copy some ideas.
Lovely ideas. Awesome insipiration
Great inspiration, lovely plants, looking forward to start decorating my walls.
Wow looks nice! I will try to do it by myself…
Thank you!
awesome, i want to do some like this. thanks
I have lot of plants at home but never though about create wall of plants.
Thanks so much for the information :).
These are great!, Nice Look
Extraordinario post, muchas gracias por tu aportación.
I love your post, Thanks!
this is real? you’re great. Only someone like that can write a post like this
I love your article, keep writing like that please
This is real? My friend your article is perfect
I think it’s a fantastic idea. I love 🙂
this is great! It served me a lot, thank you very much, keep it up
love this! thanks!
voy a utilizar este artículo en mi próxima decoración *.*
your article is really good, I liked it a lot like the presentation of your blog, thanks
thanks for your contribution, it’s really fantastic, congratulations
I really liked your article, hopefully and you go through my blog and think, I admire your blog, thank you!
Very helpful article 🙂
mil gracias por tu artículo, hace un tiempo encontré mis origenes vikingos, y tu post junto a una verdadera barba vikinga me ayudará en mi proposito.
Mis felicitaciones por tu gran post, es magnifico!
wow! It’s amazing how you wrote, you left me with the hairs on my tipped beard, hahaha. my congratulations
incredible what you have written, thanks
I love what you have written
wow! this is magnific! thanks
A great design, the reality kept me entertained, your wit in the videos impacted me, including I started my own blog, not as nice as yours, but I love it. Thank you very much. a love its
God! thank you for this perfect article, I will apply your advice to my viking project
this article is incredible
I deeply appreciate the time spent creating this post
I’ll apply it to my rockabilly style
congratulations for your post
thanks for what you have written
cool! your post is wonderful
millones de gracias!
I just wanted to congratulate you for this wonderful article and wish you a happy happy year
You are wonderful, you spend a happy Christmas
I just wanted to thank you for the quality you offer in your posts
Hey! How are you doing? I love your way of writing, you look like movie scriptwriter.
I was finishing watching Vikings, one of my favorite series and it took me a great surprise to find your blog, it’s really wonderful.
Congratulations for this great article, and congratulations for the design of your website, it is just perfect.
I just wanted to thank you for this gift in the form of an article that you have given us
I congratulate you mate, it’s wonderful!
god .. you are great, I must confess you as a good honorable viking that I am, that I copied a bit the design of your blog.
What a refreshing and innovative way to integrate greenery into your home decor! The use of natural materials like plywood and garden twine not only adds warmth and texture but also presents an eco-friendly approach. It’s good to see that you’ve considered maintenance ease in your design, as the hanging planters would simplify watering and cleaning tasks around the stairway area. Trailing plants are an excellent choice for creating a dynamic visual effect as they grow. This project is a great inspiration for those looking to enhance their living spaces with a touch of nature while keeping practicality in mind.