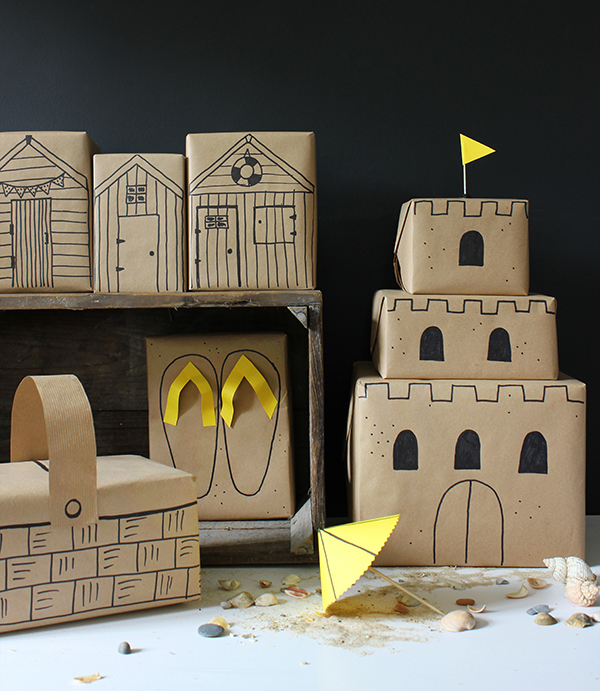
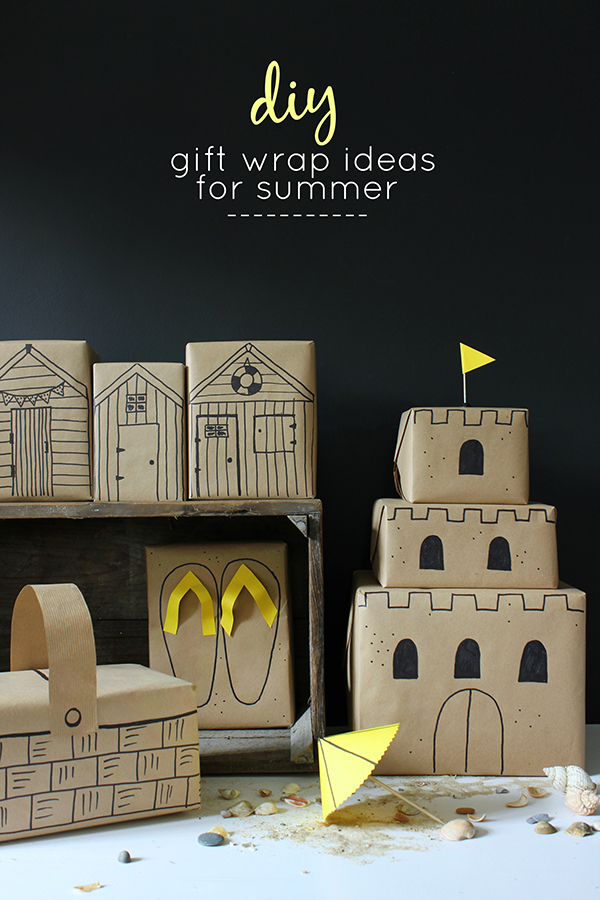
I’m fully in summer mode (even if the weather isn’t quite playing ball yet), so I wanted to do some super-easy gift wrap ideas that are perfect for special occasions over the summer months. We’re big beach fans, so I thought a seaside theme would be perfect. These are quick wrap solutions for if you get caught on the hop without a roll of gorgeous gift wrap to hand (as is often the case in our house). All you need to nail these seaside wrap projects is a roll of brown paper and a black Sharpie. Colourful paper is a bonus, but all these ideas could be done with just brown paper if that’s all you have available. The quick tutorials for each of these ideas follow below…
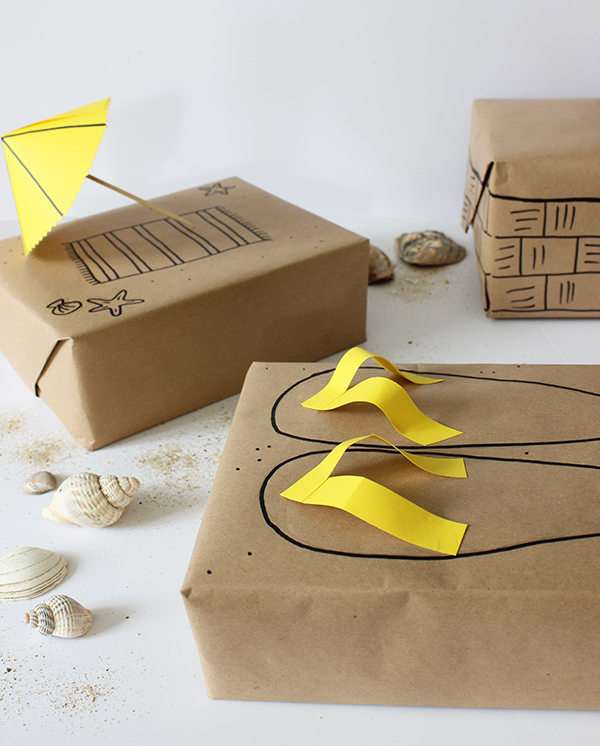
FLIP FLOP GIFT TOPPER
1. Using your black Sharpie, draw the outline of the sole of a pair of flip flops onto the top of your box. I’ve added a few spots to represent the sand.
2. Cut 4 x 1cm strips of coloured paper, around half as long as your flip flop soles.
3. Stick two strips together to form a ‘V’ (trim corners if necessary), then stick the point of the ‘V’ near the toe end of the flip flop. Allow each strip to curve up, and then stick the ends down by each outside edge of the sole.
4. Repeat step 3 on the other flip flop.
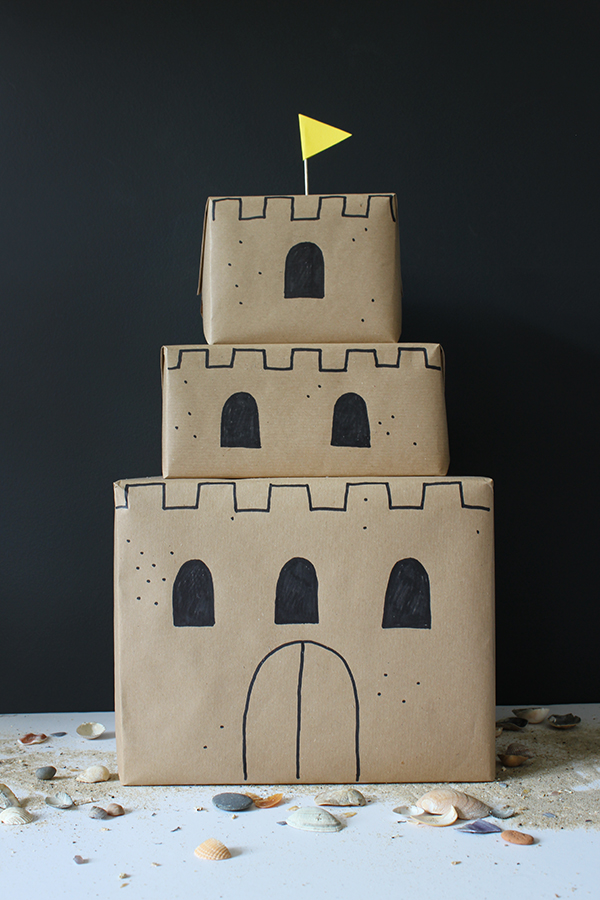
SAND CASTLE STACK
1. Choose three boxes, each a little smaller than the last and wrap in brown paper.
2. Draw the crenelated edge along the top of one face of each box using your black Sharpie.
3. Draw on the arched door and your choice of windows on the box face.
4. Finish with a flag – cut a symmetrical diamond out of coloured paper, fold in half, rest the end of a cocktail stick along the folded edge of the diamond, and glue the two sides together. I attached mine to the top box using a blob of blue-tack, which I coloured black using my Sharpie.
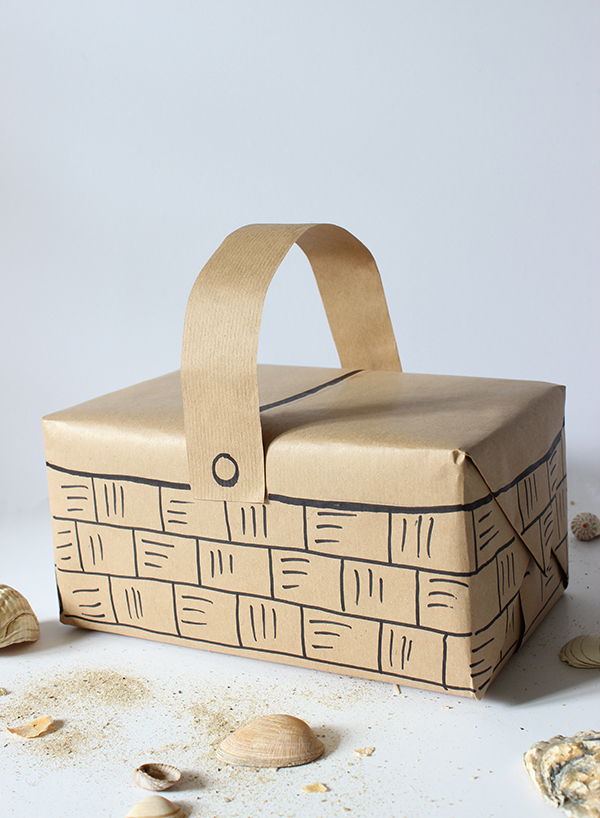
PICNIC HAMPER GIFT BOX
1. Wrap a box in brown paper. Draw a line in Sharpie all the way around the box, about an inch or so from the top. Repeat all the way down to the bottom.
2. Draw a brick pattern between the lines you’ve drawn, but leave the top strip blank. Add decoration to the wicker effect if you like.
3. Cut a 1.5in strip of brown paper, approximately double the length of the width of the top of the box. Stick down on one side, curve it over to the other side, and then stick in place on the side of the box. Draw buttons where you’ve stuck each side of the handle, and draw a line on the top of the box like a lift-up lid.
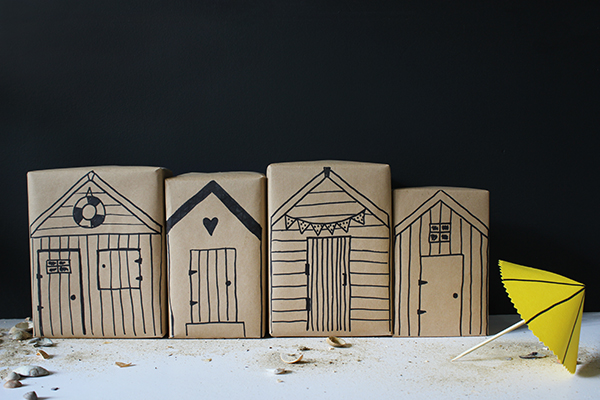
BEACH HUT LINE UP
1. Choose a selection of boxes that are similar in size and wrap in the brown paper.
2. Use the Sharpie to draw beach hut fronts on one side of each of the boxes, adding as much or as little detail as you like.
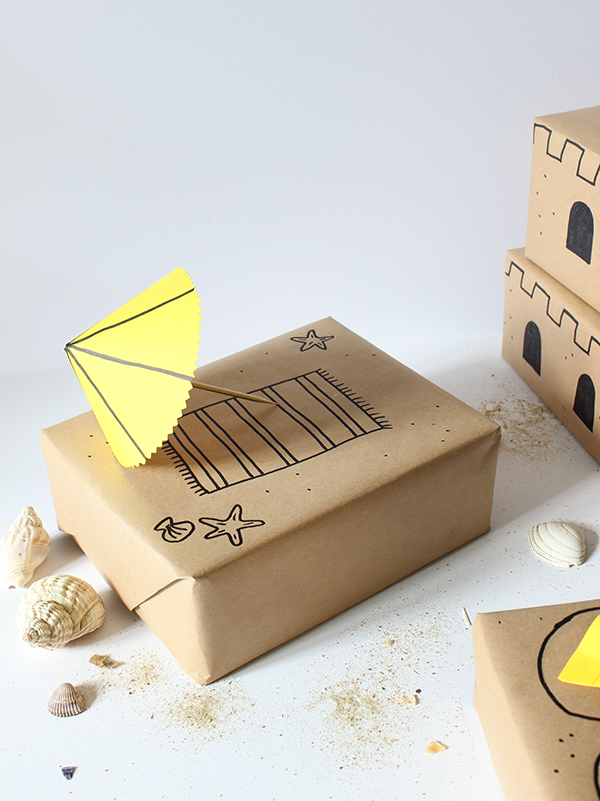
BEACH UMBRELLA TOPPER
1. Use the Sharpie to draw a beach towel and any extra detail (such as shells or star fish) to the flat top of the box.
2. Cut a circle out of coloured paper (I drew round a side plate), and cut out (I used pinking shears for the zig zag edge). Divide the circle into eight using the Sharpie (to make the stripes on the umbrealla). Cut a quarter of the circle away, and then shape the remaining circle into a very wide cone, sticking to fix it in place.
3. To make the umbrella stick, cut a wooden skewer in half and stick into the inside of the top of the cone using sellotape or blue tack.
I love seeing your take on these ideas, so if you give any of them a go, please do share them on social media and tag me so I don’t miss them, whether it’s via Twitter, my Facebook page, or Instagram. Happy summer – let’s hope the sun comes back out to play soon!
Click through to see my other gift wrap posts using brown paper: Christmas or Kids.
I’m going to link this post up to this month’s Create Make Share – the theme is ‘Upcycle’. If you’ve shared anything you’ve created on your blog, from a home DIY to a kids’ craft activity, why not add the link to your post, or you can join in on Instagram using the hashtag #CreateMakeShare.
Love these cute wrapping ideas!
Amazing !